Free Time Travel Coding Activity
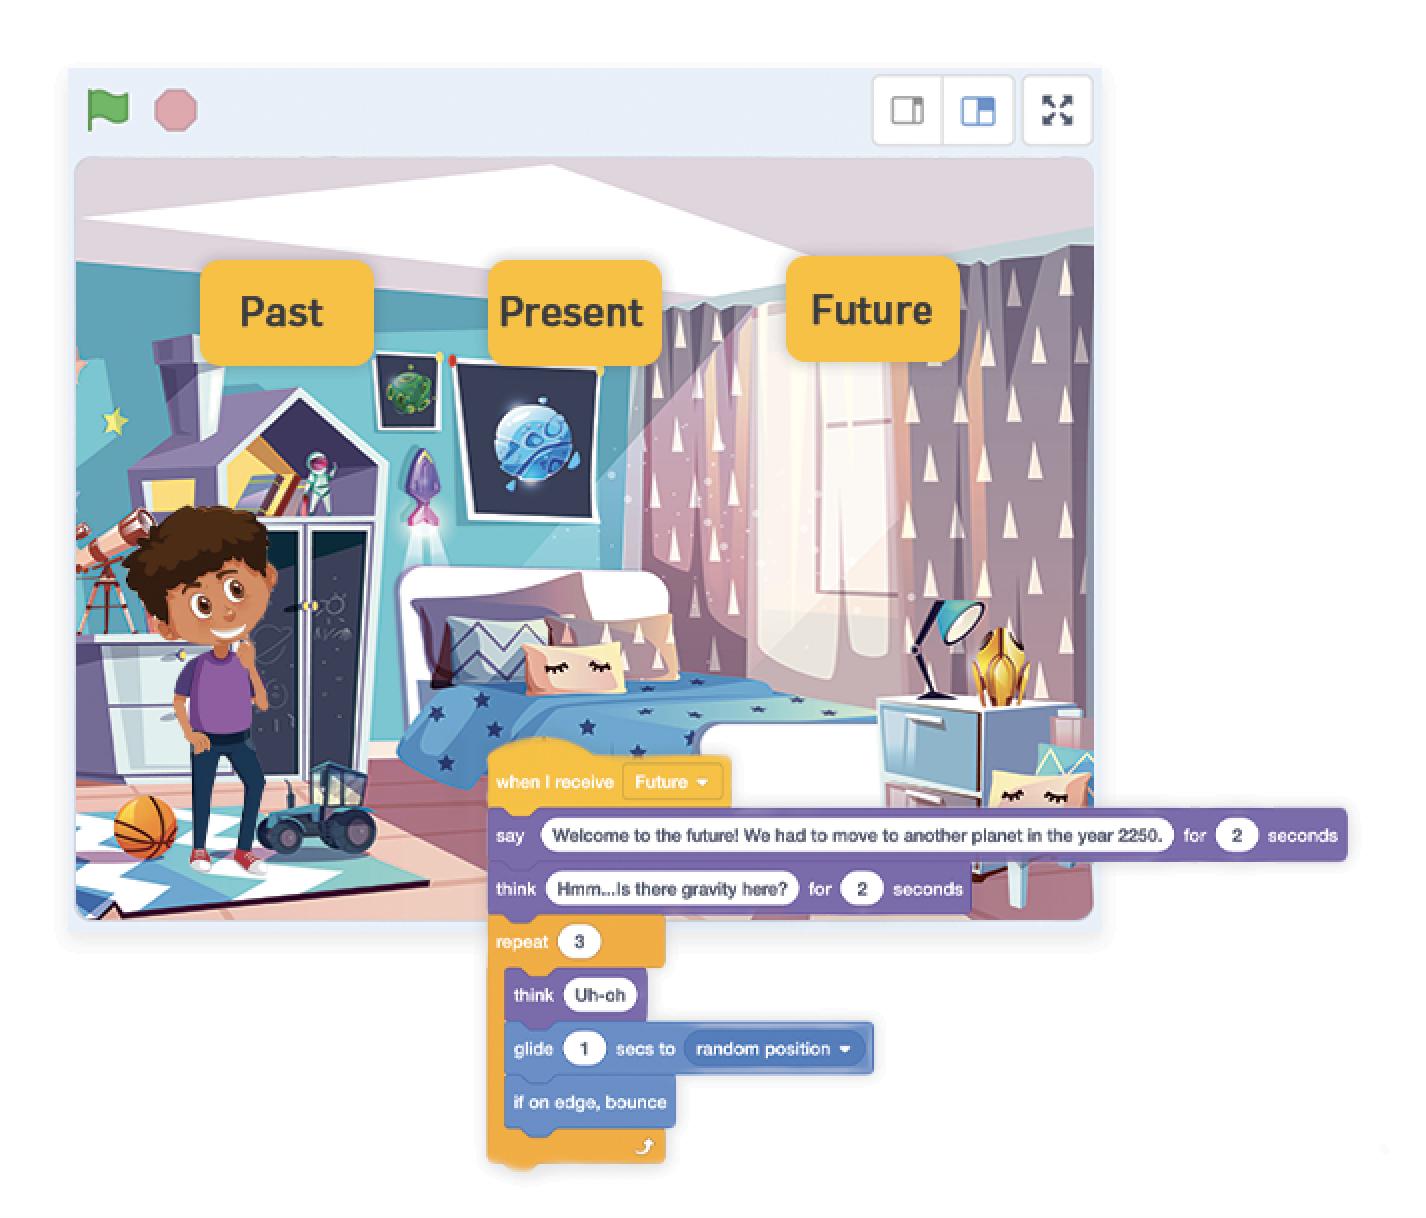
Here’s a FREE coding activity from one of our online coding lessons, which guides you through creating your very own time travel animation in Scratch…
Let’s get started!
1. Go to the Scratch website.
2. If you already have a Scratch account, click ‘Sign in’ and enter your login details, otherwise click ‘Join Scratch’ and create your free Scratch account.
**3. Click on ‘Create’ in the top left corner to start a new project.**If you’re logged in and don’t see the ‘Create’ button, try clicking the ‘File’ menu and then ‘New’.
Time to create your animation!
4. Click the ‘Choose a Sprite’ button to open the sprite library (bottom, right corner).

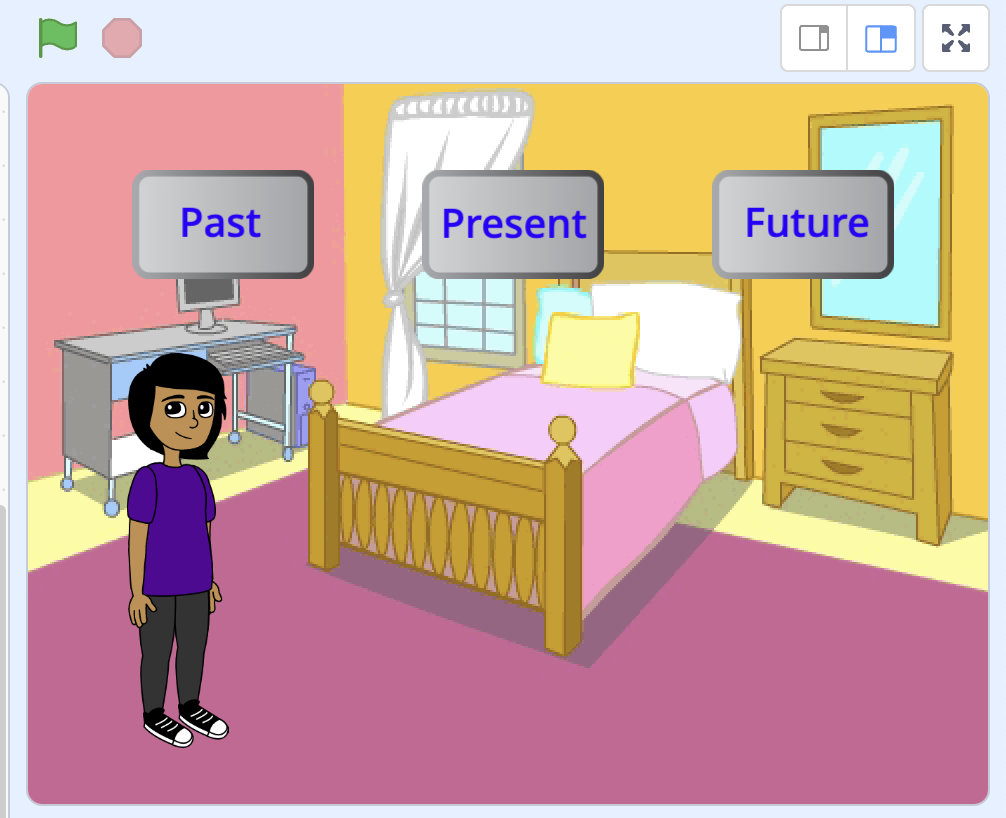
5. Add in ‘Dani’, or any other person, as your time traveler sprite.
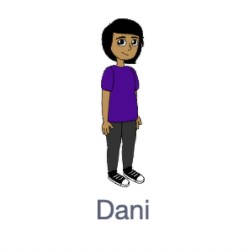
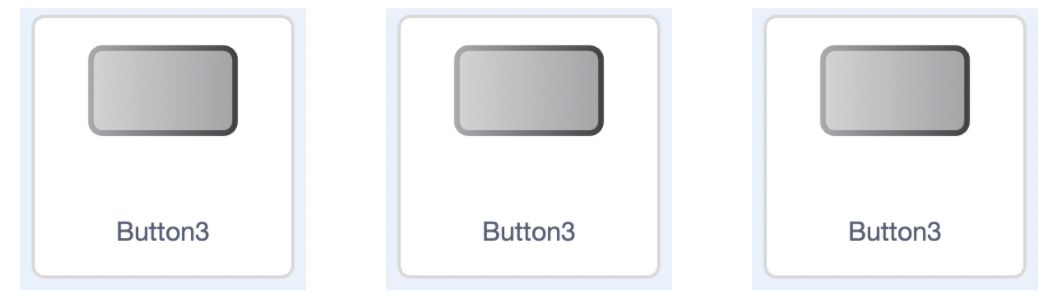
6. Add in three button sprites, we will edit these later to make them say ‘Past’, ‘Present’ and ‘Future’
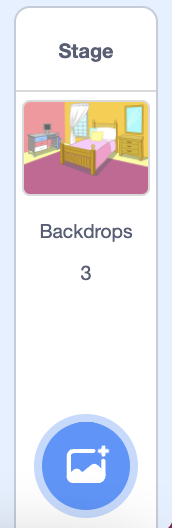
7. Now you’ll need to go to the Scratch backdrops library, this is also found in the bottom right of your screen, the icon looks like the one below. You’ll first need to add in one present day background (we picked the Bedroom)
8. Next we will add in one future background, we picked one of the space backgrounds, but you can pick whichever you like!
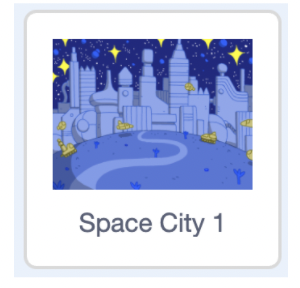
9. We will also need to add in one historical background too, we went for one of the castle backgrounds
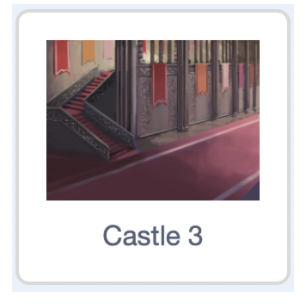
Optional: Want a challenge? Draw or upload your own backgrounds into Scratch!
10. Edit your button sprite costumes so that each of them say ‘Past’, ‘Present’ or ‘Future’. You’ll first need to click on the button sprite you want to edit, then go to ‘Costumes’ in the top left of your screen. Once here, you can use the ‘T’ (Text) editing tool to write ‘Past’.
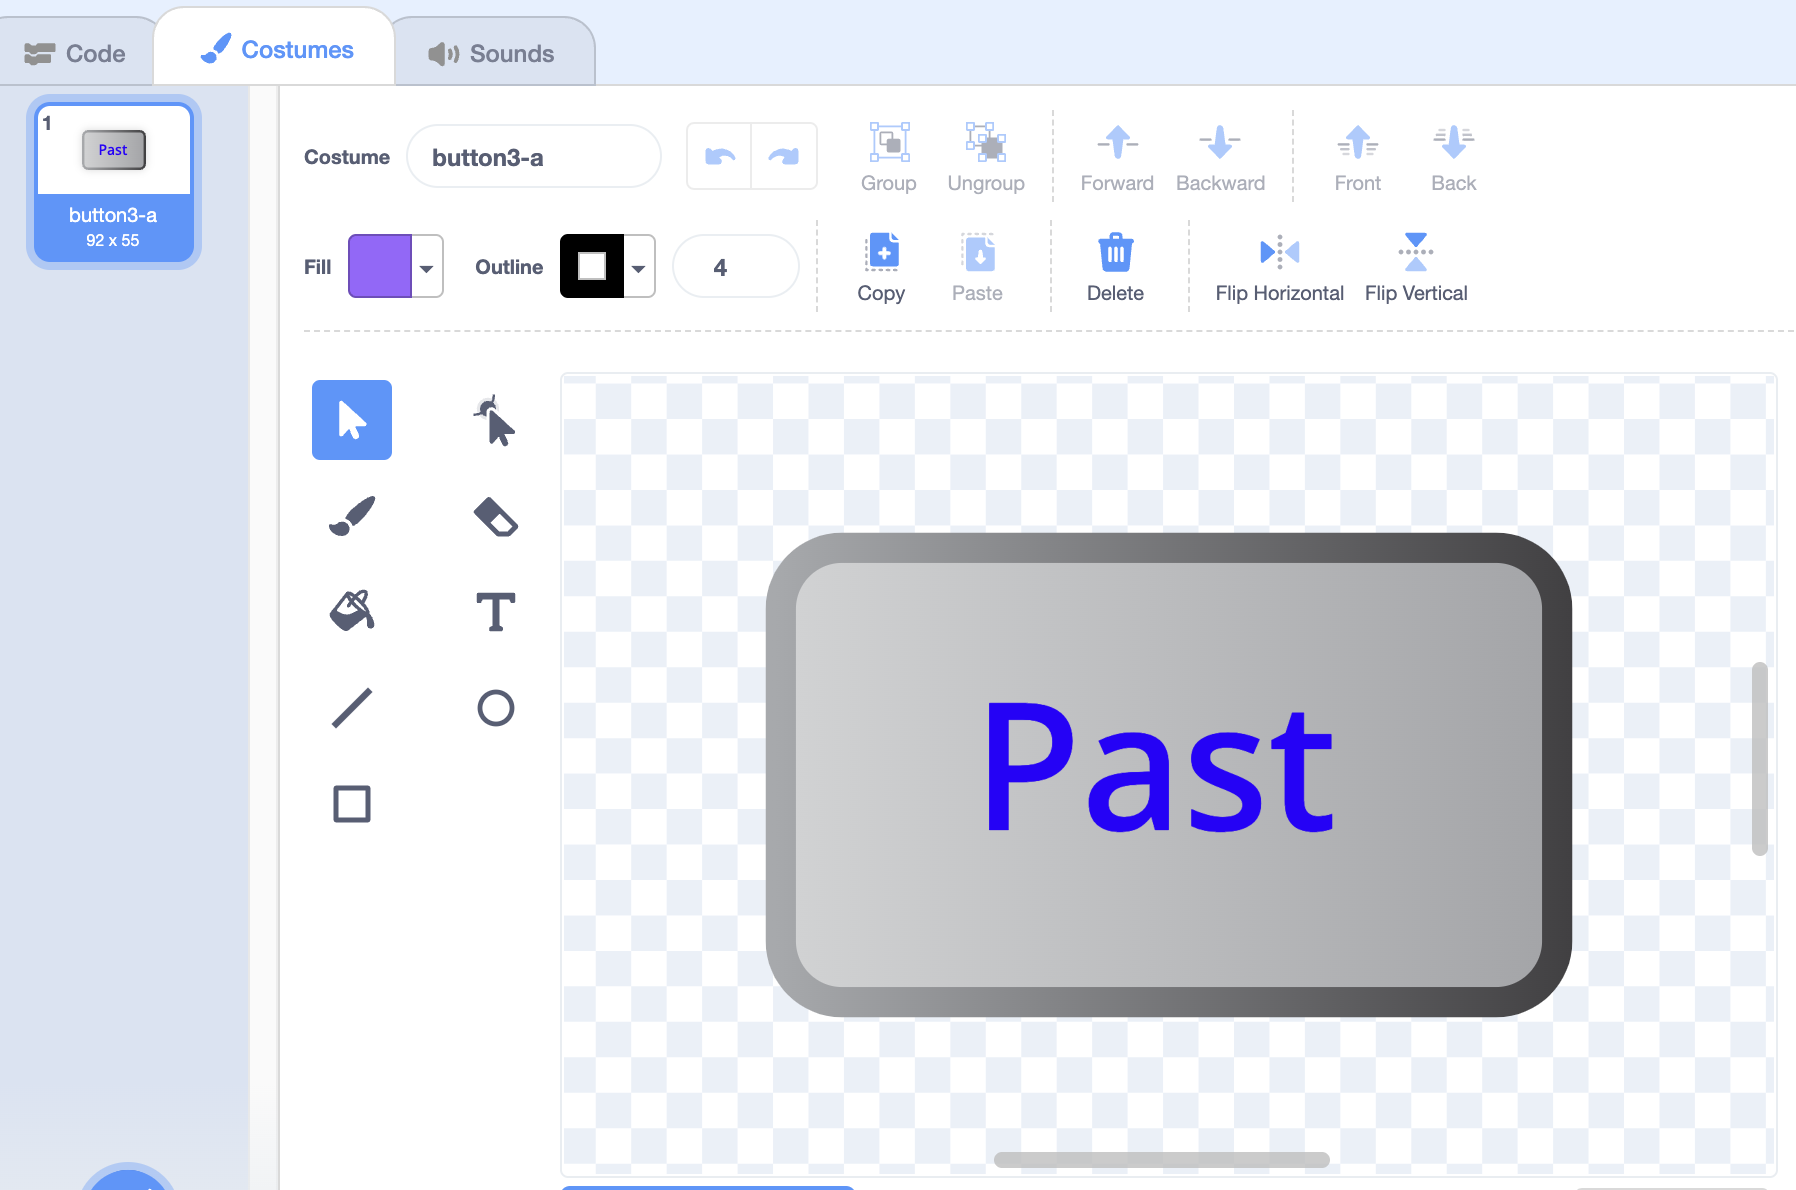
11. Repeat this step for your other button sprites, except change the text to ‘Present’ and ‘Future.
12. Return back to the main screen and position your button sprites on your scratch screen, we have put ours at the top of the screen.
Note: If you are having trouble returning to the first background. Check the left side of your screen for the panel with all the backgrounds saved.
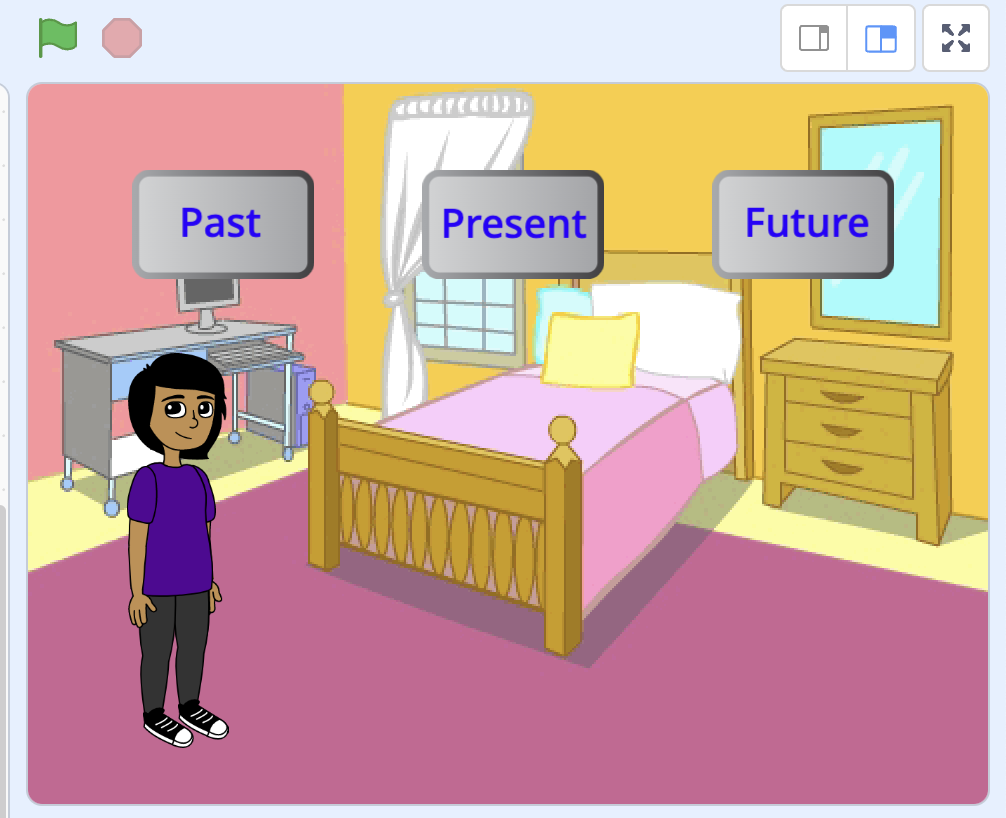
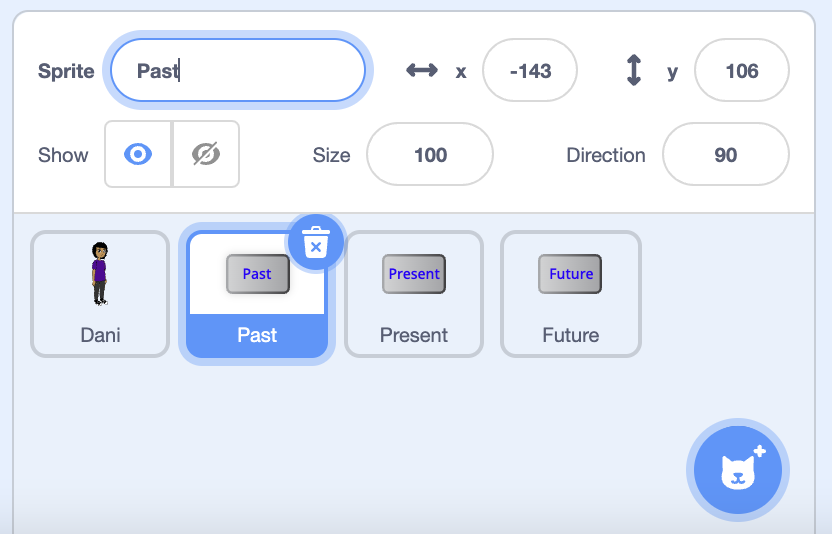
13. To make it less confusing when we begin coding, we will now rename your sprites. You can change the name where it says Sprite, please see image below. Rename your Past, Present and Future buttons to be called Past, Present and Future as well!
14. Past sprite_:_ First, ensure you have clicked on the Past button as this is the sprite we will code now. Add the below code so that when we click on the past button something will happen (it won’t happen yet, but we are setting our program up to do something!)
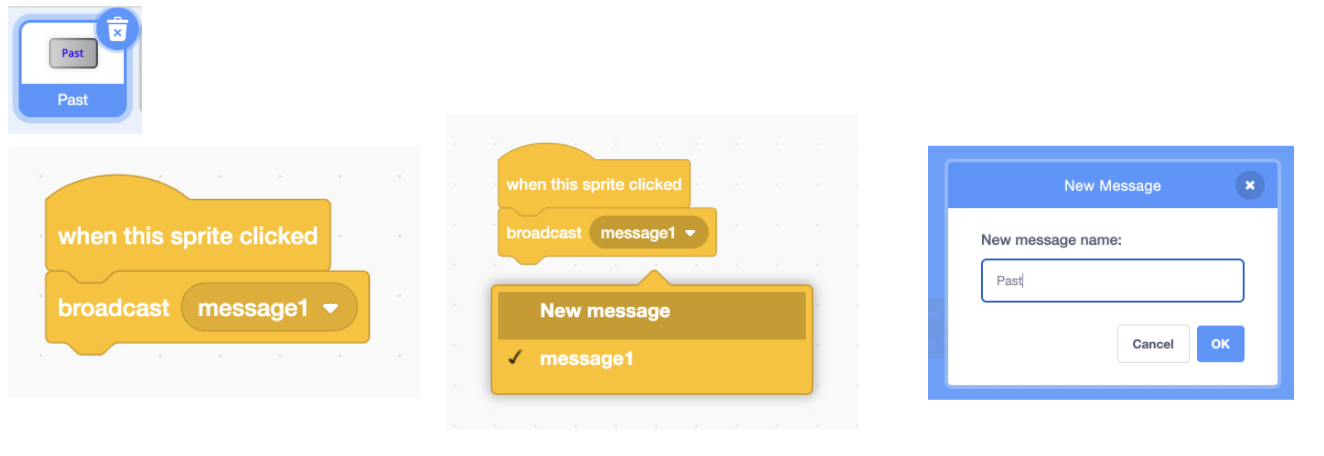
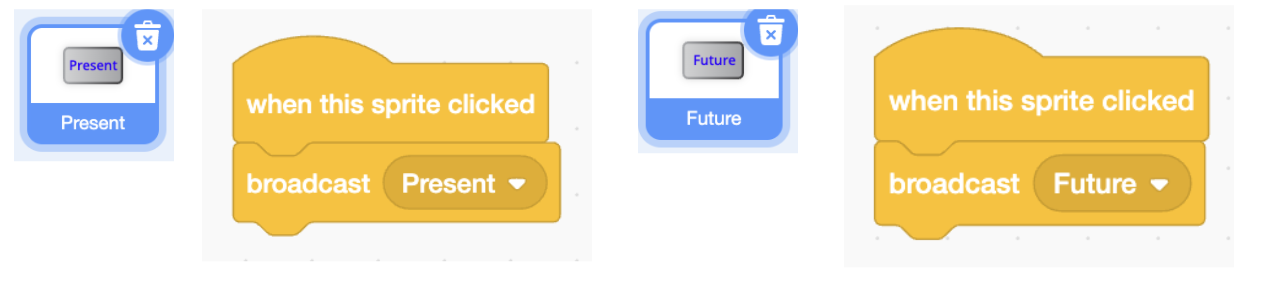
15. Repeat this for the Present and Future button sprites too.
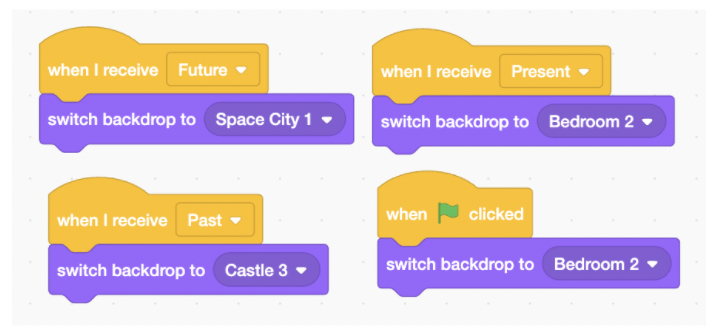
16. Backdrop code: now we are going to code our backdrops. First, click the backdrop icon under ‘Stage’. Then add the following code to the script area.
This code will mean that when you click on the past, present and future sprites, then your backdrop will change to the right era! It will also make it so we always start off in the present. NOTE: If you have different backgrounds to ours, yours will have a different name. Just ensure that they match up with the time period you want them to!
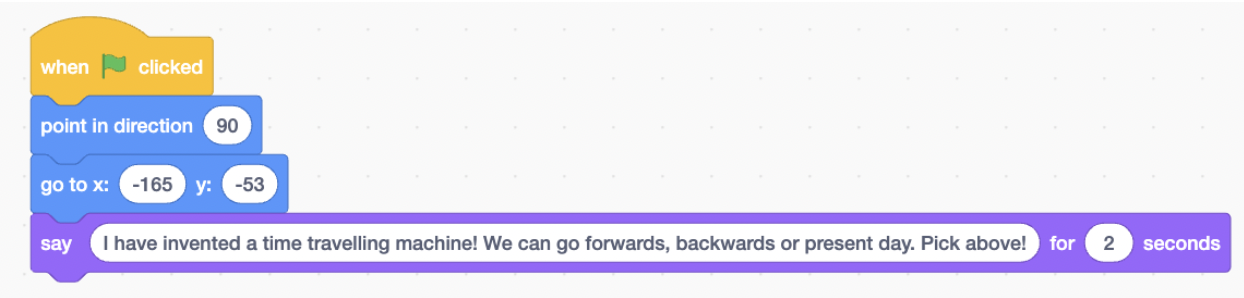
17. Time traveler sprite: click on your time traveler sprite, mine is called Dani! We are going to make sure that at the start of the game she always starts in the same place, facing the same way and tells us that she has invented a time travel machine! Add the below code to your game (you can change what she says).
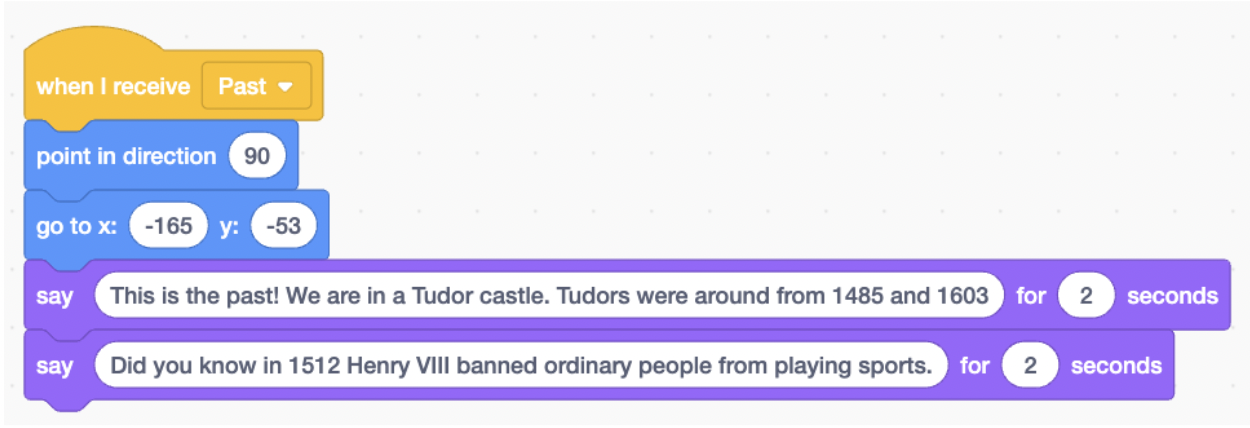
18. Now I am going to make Dani say something when she arrives in my Tudor period. You might want to do some research into your chosen era too so that the time traveler can tell your player something new when they arrive! Add the below code to your Time Traveler sprite.
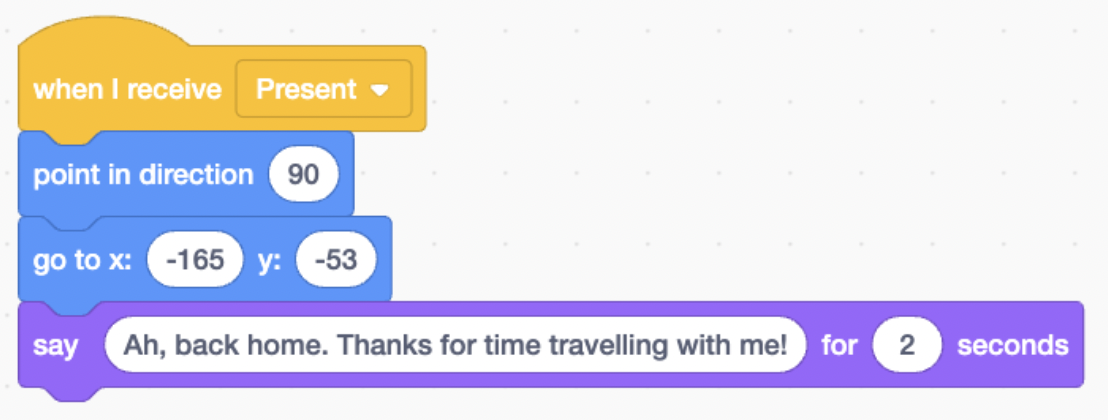
19.Now we will code the present. We will still be coding the Dani sprite though! Add in the below code, but feel free to change any of the text or add in your own!
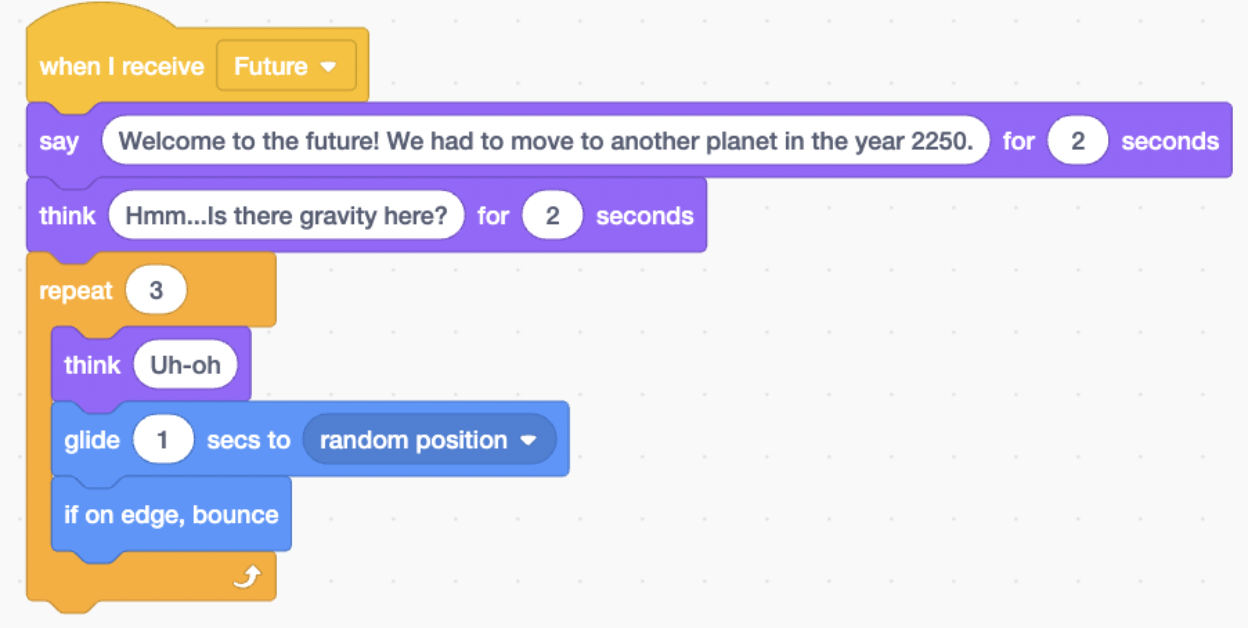
20. Finally, we will code the future! This one has a few more lines of code, because we have made our sprite float around in space! Add the below code to your program.
21. Congratulations - you have coded your own time travel animation!
Share it!
14. Now it’s time to share your creation. Click the orange ‘Share’ button at the top of the screen.
The ‘Share’ button will only be visible if you have verified your email with Scratch. If you can’t see the button, click on your profile name in the top right corner, select ‘Profile’ and follow the instructions in the orange banner at the top of the screen to verify your email.
15. Click the ‘Copy Link’ button.
You can share that link with friends and family by email or text message and they’ll be able to watch your animated card.
THANK YOU for creating this fun Time Travel animation with us!
If you enjoyed this coding activity, take a look at our online coding classes for kids that are a lot of fun, but also really effective at teaching coding techniques and challenging students to develop their skills. Don’t miss this opportunity to build your own games and animations with a small group of kids of the same age and experience level as you.